Monday, May 19, 2014

Long Tee upcycled to Peplum Top

I'm a part time couponer and some deals are just too good not to share. A couple of weeks ago as I was shopping for my mother's day gift, I went to JCP and they had a deal where if you bought $75 worth gift cards, you'd get back $15 to spend in the store. I did two separate transactions and got 2 $15 gift cards to use the Monday after Mother's day.

I went to JCP last Thursday and headed straight for the clearance racks. I've been wanting to try upcycling, but still a little ehh about using items from the thrift shops and the deal I got was better than any garage sale or thrift shop.


With two transactions totally just over the $15 required, I left the store with all of the above for $1.95 after the in-store coupons. The 4 long tees (2 red, 1 black, 1 white) were each $1.97. The measuring cup was the most expensive item @ 9.99. The green tee and the pants were both 6.97. I split the sale and paid $0.99 and $0.96. Okay now to the actual project. I was inspired by a few tutorials through Pinterest, but Love Megan was probably closer to what I did. I, however used 2 long sleeved shirts. They were both XL and loose fitting.

Sorry for the red on red. I first put on the shirt and marked out where I wanted the waist to hit me. Then I put it back on the dummy to pin and check out the shape.

Back in my craft I had to shorten the sleeves to get it similar to the inspiration piece. 

I folded the shirt in half and cut it at the mark I'd made earlier. Since I wasn't using a fitted tee to make my peplum, I had to add some darts to the front. Sorry I skipped that picture. I added two to the front and after the top was completed and still felt too loose, I took in the side seams with my serger. 

I cut out the bottom of the second shirt and and used one whole pieced and half of the second shirt (so I had 3 panels of the lower half of the shirts to use for my flare portion of the shirt.

Using my serger, I joined the seams so that I had one wide tube.

I hand threaded my elastic bobbing, set my stitches to the longest straight stitch and gathered the fabric.

I pinned the right sides of the top of the shirt to the right side of the bottom skirt by putting shirt right side out into the skirt tube (keeping the skirt wrong side out). I then pinned , but didn't really make too much of an effort to match the seams. Finally I used the serger to (4 threads stretch setting) to join the two pieces.


Hear is the joined peplum inside out as I marked out where to take in the sides some more.

The picture on the left (although hard to tell) had not yet had the side seams reduced. The image on the right has a smaller seam.

The entire project took about 90 minutes to complete and I was able to wear my top the next morning. 


Friday, May 16, 2014

Wedding Picture purse

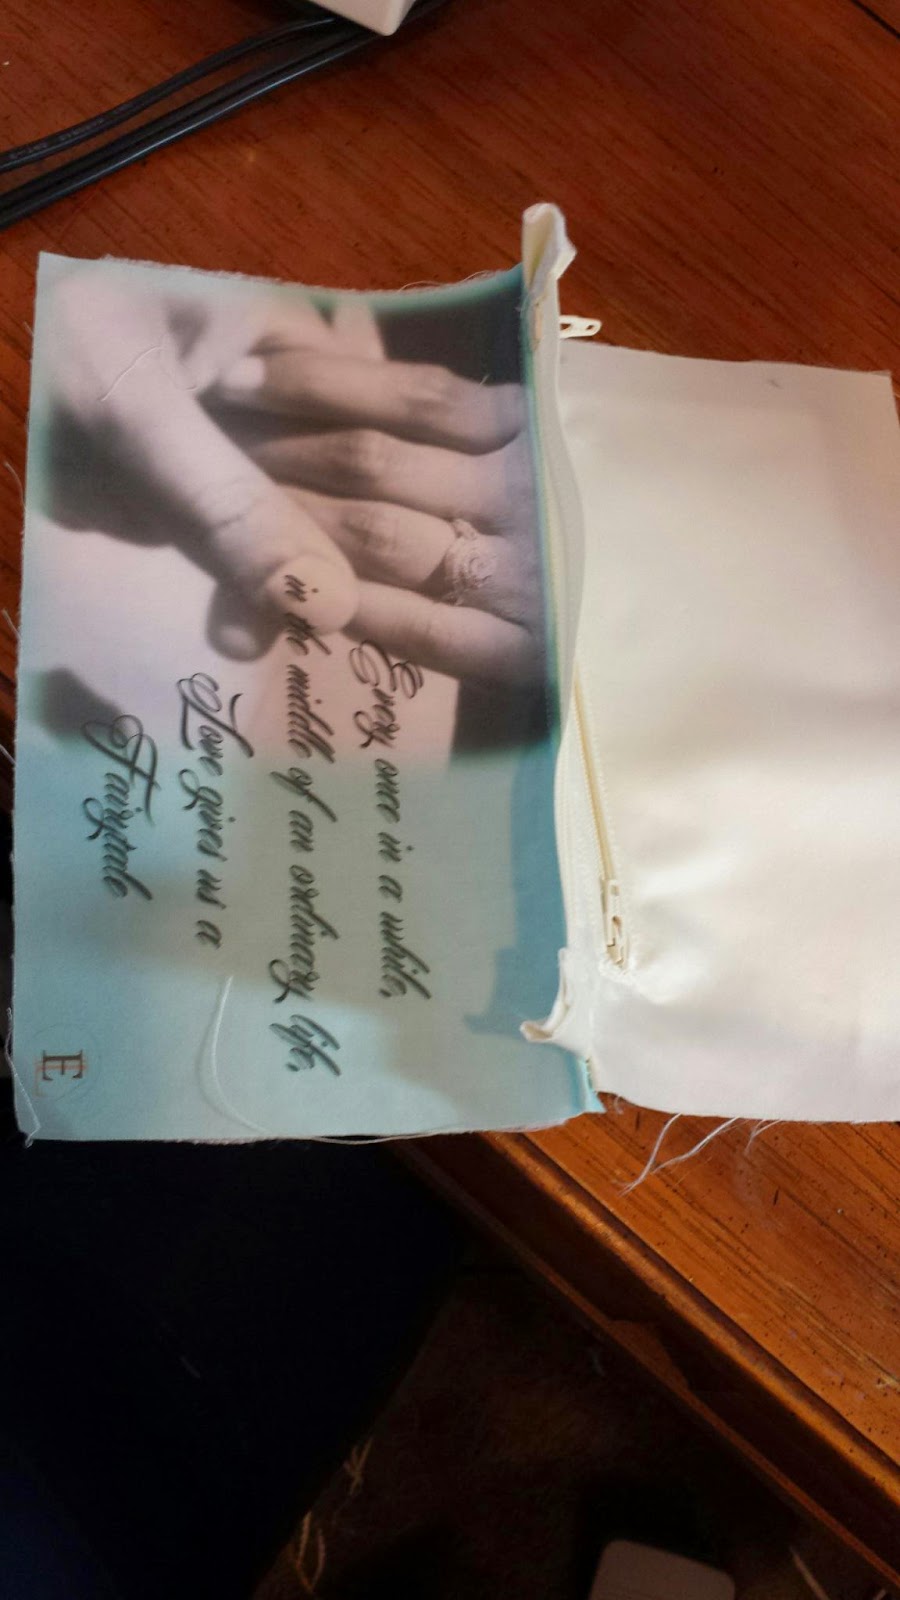
My friend got married a couple of weeks ago. I remember how nice it was a to have purse on my wedding day and wanted to do something for her, but I wanted it to be very special to her. I called her fiance (my other friend) and asked him to send me a picture that had he and her daughters. Then I went to their FB and got the picture they'd posted from their engagement seen below.  I used Photoshop to put together the images and print them. One side was the below picture and the other side had the picture he sent me. 
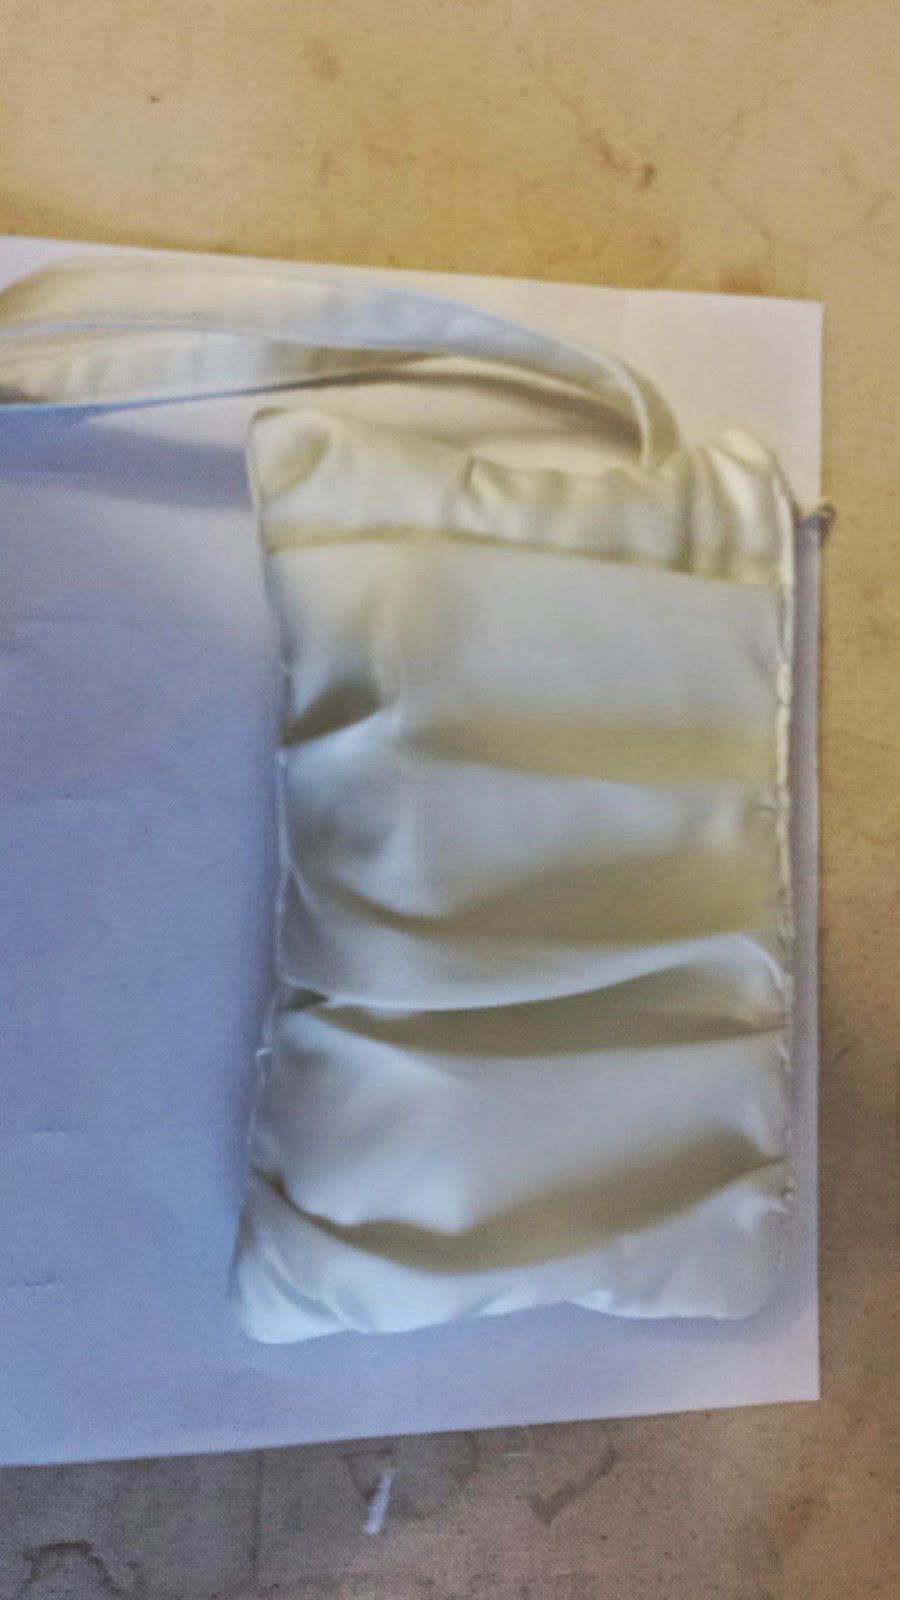
As you can see, the lining has the printing and the satin ivory is 


I decided to put pockets on the outside so that she could put

Her dress was a ruched ivory gown so I ruched the front of the purse.

Inside on the zippered pocket side was the engagement ring and a nice quote I found online. 

On the other side was the picture of her loves. 

You can almost see the wristlet in her left hand. It matched her dress so incredibly. Her mom actually carried the purse through most of the wedding so it was very handy. My friend loved it and it was one of the best gift I've ever given someone. 


Sunday, April 27, 2014

McCalls 6083 with some modifications

Pattern: McCalls 6083
Been a slow week creating wise because I've been battling the flu. I did however want to work on my outfit for the destination wedding I'm going to be attending. I bought the McCalls 6083 almost a year ago, but just wasn't ready to tackle. Well during this last slow week, I decided to give it a try. I wish I'd lengthened the top part to account for my ample busts, but the outfit is doable. I loved how it turned out. I used the top style for view D and E and then used the bottom length for view B.

I got 3 yards of fabric because it was napped and I wanted to be sure I had enough. Since it was 60 inches crosswise grain, I was able to fold and cut my fabric along the crosswise grain so that the stripes went vertically down my body instead of across. 

This was everything laid out. I even had some fabric left over to use as lining in my clutch. I haven't made that yet. 

Final finished product. I'm satisfied. As you can see, I didn't keep the loose bottom. Since the view B was already a shorter length, I folded it under at 2.5 inches and made three rows of 3/8inch elastic casings. Love the length which will be perfect for a beach wedding. 


Wednesday, April 23, 2014

Better Fabric labels without transfer paper using Freezer paper tutorial

Nothing's worse than doing a transfer print and forgetting to flip the picture before printing. Thing great thing about this method is there is no need to flip anything. Printing on fabric is pretty easy, but companies that sell "special fabric for the printer" don't want you to know that. You can use this method, but if you don't have freezer paper, don't be discouraged, the graphics fairy used spray adhesive, but that can get a bit messy.

What you need:

Freezer/Butcher paper. Usually found near the aluminum foils (used to stabilize the paper to feed through printer.
Fabric - light color especially if printing color (I used the quilter's fat quarters and got 3 sheets from it, Muslin works great as well)
Iron and solid surface (to adhere the fabric to the freezer paper)
Cutting mat, knife (paper), rotary cutter (fabric)
Pinking shears (optional)
Computer injet printer with pigment ink and not the cheap refills
Your designs (I used MSWord label maker for the labels, but had already made my logo in Illustrator a while back)
Vinegar (I haven't used this for other projects, but decided to give it a try thanks to Dolls and Daydream) It is said to set the ink and make it more permanent. Probably a good idea if your item is going to be washed a lot.
Ultrabond tape or sheet (optional)

For this project I have two types of labels. A fold and sew kind for my bibs and burp cloths and clothing, and then an iron on type for my purses and other products. When I did this the first time with the iron on, it was just too difficult to get the peel of the transfer perfect every time. Besides with this method, I paid like $4 for the freezer paper and 99 cents for the fabric quarter at Walmart. Transfer paper usually run you $10 for about 6 sheets. Buying fabric printing sheets was out of the question as well once I realize that this is pretty much the same thing they are doing on a bulk level.

1. Make you design in whatever program you choose. Make sure to spell check and don't end up like  me with a bunch of misspelled labels on products that's been sold. LOL. Print a test copy on regular paper and make sure that's what you want.

2. Prepare the fabric and freezer paper. I pull out and cut the freezer paper at full width x 11 inches. Then I cut out 2 8.5X11 (paper size) from that piece. You can cut your fabric to size first or just iron on the freezer paper and cut down. I prefer to cut my fabric to size.


3. Lay the fabric wrong side to shiny side of the freezer paper and iron. Make sure all air bubbles are out. You don't want to end up jamming your printer. NO STEAM

4. Take your "fabric paper" to the printer and place it according to the manufacturer direction in the printer. Cross your fingers and hit print.


5. When it's finished printing, let the ink set for about 15 minutes (probably don't need that long unless you're printing bigger images).


6. This is new for me, soak it in a vinegar bath for 5 minutes. Run under cool water to rinse the vinegar smell (which evaporates as it dries anyway).

7. Let it dry and cut as desired. For my fold and sew, I'll just cut, fold and iron everything and place in a zip lock bag for storage. For my iron on, I cut out a long strip of ultrabond and iron to each row of labels on the wrong side (I could cut out a whole sheet size, but I'd be wasting a lot of ulrabond). Cut with pinking shears and place in ziplock for storage.
 Laid out on a towel to dry.

I used the pinking shears on the sides so it wouldn't fray. 

I then lined up everything and cut across every 1.25 inches. Lesson learned is next time I'd fold first and see where things lined up before cutting. 

You can see where the writing sort or disappears on the fold. But that's not the end of the world. 


For the iron on labels, I cut out the strips of the ultrabond and ironed it on. 


 Peeled the backing off the entire thing. 

Then cut with the pinking shears to give it some style. At this point the adhesive would have kept it from fraying, but it looked boring just being a regular rectangle and cutting curves would have taken too long. :-)

Total labels done: 90 (30 folded, 60 iron on and 1 sheet of lost labels due to wetting the fabric too early)

Small hint: You can use this method to print pictures to use as lining for a personalized purse. Another tutorial coming as soon as I give the recipient her gift. 

Tuesday, April 22, 2014

More than just another fold and sew placemat purse

Thanks to many pioneers, I've fallen in love with placemat purse making. I, however, quickly got bored with the simple fold and sew. I started challenging myself to make purses that one would be hard pressed to identify the placemats in the purse.
I just completed this white vegan leather placemat purse that really challenged me. I wanted to put in zipper, but did not want to lose the integrity of the placemat. I ended using new techniques and even getting a rivet set for the vinyl.

Currently, I'm working on another one that I'm still trying to work my head around. 
Meanwhile, here are a few more. 
 Scalloped beaded placemat using zipper as closure.

 This used two round placemats  and gusset to achieve the look.
This was also two placemats used along with a vegan leather piece for the flap. 

Sunday, April 13, 2014

African themed wear

Using Dana's method,  I made this adorable t-shirt dress for my niece. I didn't have her nearby and made everything based on what her regular shirt/dress size is. The tee was just a plain tee that I cut off some inches and used a strip for the ruffles down the center. 
 I mailed it to her mom and got back this beautiful picture today. It fit perfectly. I can see she also used the belt for a head piece instead. Absolutely gorgeous.


This other piece below was made of a onesie based on the size the mom said. It was a one year old's birthday present. I made the applique to add to pizzazz to the top and to make the two pieces seem more cohesive. Now I can start putting these in my etsy shop. 

Saturday, April 5, 2014

Sewing Machine Needle Organization

I sew everything from purses to clothing and am constantly switching needles. The problem with doing that in the same project is you get lazy and set the needle down next to another and other than the size, it's too tedious to try and figure out what needle is for what. Especially if you don't know the color code. This was a quick and dirty fix using items I already had at home.

Materials used:
Piece of scrap cushion foam (1 inch) from a previous project. The foam works cause it won't damage your needle.
Piece of thin ribbon or yarn would do
School glue
Piece of paper for your labels

For the label I just put what the package said and then included the size.

Step 1:
Cut foam
 Step 2:
Make label. I made mine three or four across each row. Set aside.
 Step 3:
Use a long need to run a piece of ribbon through the foam. You could also pass it the short way and tie. I didn't want the ribbon getting in the way.


 Step 4:
Glue the label to the foam.
 Step 5:
Tie the string, stick in your needles per the labels and voila. No more confusing needles.

@elsielorpu on Instagram