Nothing's worse than doing a transfer print and forgetting to flip the picture before printing. Thing great thing about this method is there is no need to flip anything. Printing on fabric is pretty easy, but companies that sell "special fabric for the printer" don't want you to know that. You can use this method, but if you don't have freezer paper, don't be discouraged, t
he graphics fairy used spray adhesive, but that can get a bit messy.
What you need:
Freezer/Butcher paper. Usually found near the aluminum foils (used to stabilize the paper to feed through printer.
Fabric - light color especially if printing color (I used the quilter's fat quarters and got 3 sheets from it, Muslin works great as well)
Iron and solid surface (to adhere the fabric to the freezer paper)
Cutting mat, knife (paper), rotary cutter (fabric)
Pinking shears (optional)
Computer injet printer with pigment ink and not the cheap refills
Your designs (I used MSWord label maker for the labels, but had already made my logo in Illustrator a while back)
Vinegar (I haven't used this for other projects, but decided to give it a try thanks to
Dolls and Daydream) It is said to set the ink and make it more permanent. Probably a good idea if your item is going to be washed a lot.
Ultrabond tape or sheet (optional)
For this project I have two types of labels. A fold and sew kind for my bibs and burp cloths and clothing, and then an iron on type for my purses and other products. When I did this the first time with the iron on, it was just too difficult to get the peel of the transfer perfect every time. Besides with this method, I paid like $4 for the freezer paper and 99 cents for the fabric quarter at Walmart. Transfer paper usually run you $10 for about 6 sheets. Buying fabric printing sheets was out of the question as well once I realize that this is pretty much the same thing they are doing on a bulk level.
1. Make you design in whatever program you choose. Make sure to spell check and don't end up like me with a bunch of misspelled labels on products that's been sold. LOL. Print a test copy on regular paper and make sure that's what you want.
2. Prepare the fabric and freezer paper. I pull out and cut the freezer paper at full width x 11 inches. Then I cut out 2 8.5X11 (paper size) from that piece. You can cut your fabric to size first or just iron on the freezer paper and cut down. I prefer to cut my fabric to size.
3. Lay the fabric wrong side to shiny side of the freezer paper and iron. Make sure all air bubbles are out. You don't want to end up jamming your printer. NO STEAM
4. Take your "fabric paper" to the printer and place it according to the manufacturer direction in the printer. Cross your fingers and hit print.
5. When it's finished printing, let the ink set for about 15 minutes (probably don't need that long unless you're printing bigger images).
6. This is new for me, soak it in a vinegar bath for 5 minutes. Run under cool water to rinse the vinegar smell (which evaporates as it dries anyway).
7. Let it dry and cut as desired. For my fold and sew, I'll just cut, fold and iron everything and place in a zip lock bag for storage. For my iron on, I cut out a long strip of ultrabond and iron to each row of labels on the wrong side (I could cut out a whole sheet size, but I'd be wasting a lot of ulrabond). Cut with pinking shears and place in ziplock for storage.
Laid out on a towel to dry.
I used the pinking shears on the sides so it wouldn't fray.
I then lined up everything and cut across every 1.25 inches. Lesson learned is next time I'd fold first and see where things lined up before cutting.
You can see where the writing sort or disappears on the fold. But that's not the end of the world.
For the iron on labels, I cut out the strips of the ultrabond and ironed it on.
Peeled the backing off the entire thing.
Then cut with the pinking shears to give it some style. At this point the adhesive would have kept it from fraying, but it looked boring just being a regular rectangle and cutting curves would have taken too long. :-)
Total labels done: 90 (30 folded, 60 iron on and 1 sheet of lost labels due to wetting the fabric too early)
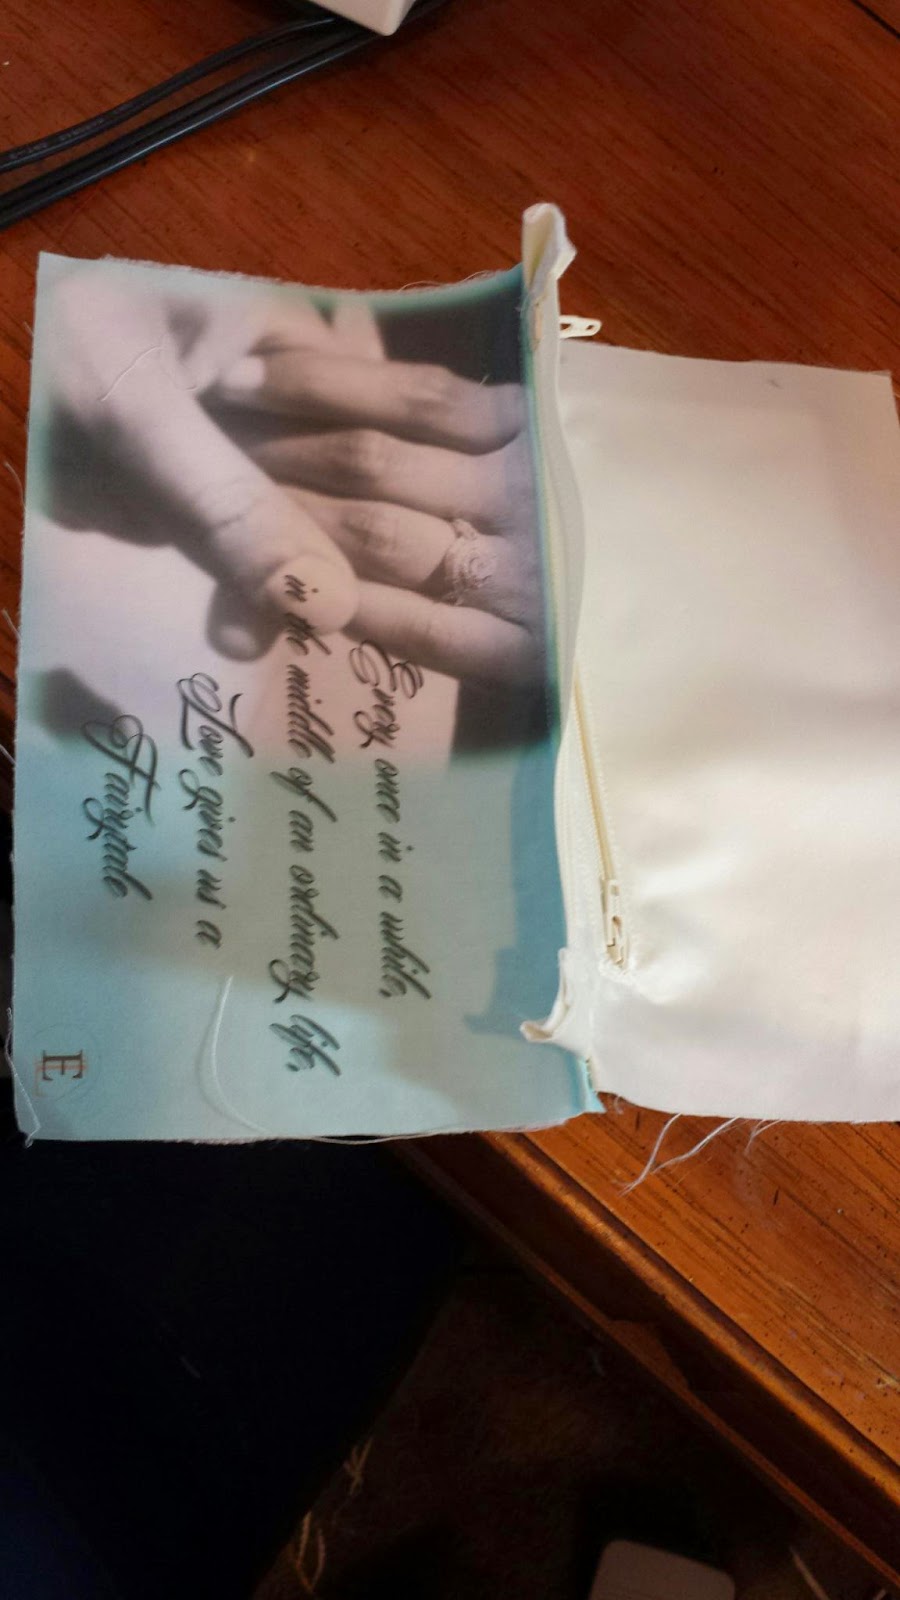
Small hint: You can use this method to print pictures to use as lining for a personalized purse. Another tutorial coming as soon as I give the recipient her gift.